Security awareness assessments are an effective means of gauging your employees susceptibility to clicking on suspicious links or engaging in less-than-ideal actions when it comes to handling received emails. While Maltek Solutions provides Security Awareness assessments, not every organization may have the budget to enlist an external resource. If you use O365 for your business email, you can conduct your own awareness assessments for only $5/month using the built-in Attack Simulation feature.
Prerequisites
To add the correct license, follow the steps below:
- From the O365 Admin menu, select the Subscriptions option, and then choose Add more products.
- From the Purchase services menu, click on the Search field and enter "defender" to filter out other licenses that aren't relevant.
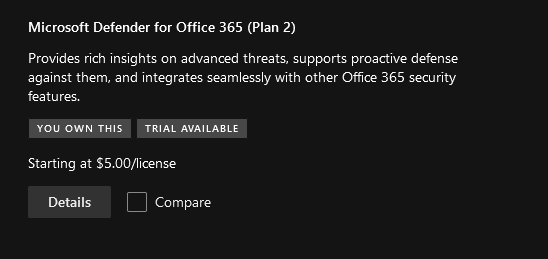
- Scroll until you see Microsoft Defender for Office365 (Plan 2). Click on Details.
- Select the Microsoft Defender for Office 365 (Plan 2) option, a license quantity of 1, and a subscription length that suits your needs.
Once you've purchased the license, assign it to the user who will be configuring and launching the assessments. To do so, go back to the O365 admin center and select the organization user. This will open the slide-out menu showing the user details. Click on Licenses and apps to list out all licenses associated with that user. Ensure that Microsoft Defender for Office 365 (Plan)2 is checked and click Save changes.
Configuring and Launching a Campaign
To configure, view, and launch a security awareness campaign, known as an attack simulation in O365, browse to the Attack Simulator page of your O365 instance located at: https://security.microsoft.com/attacksimulator
From the attack simulator main page, select the Simulations menu option, then from the Simulations tab, select Launch a simulation.
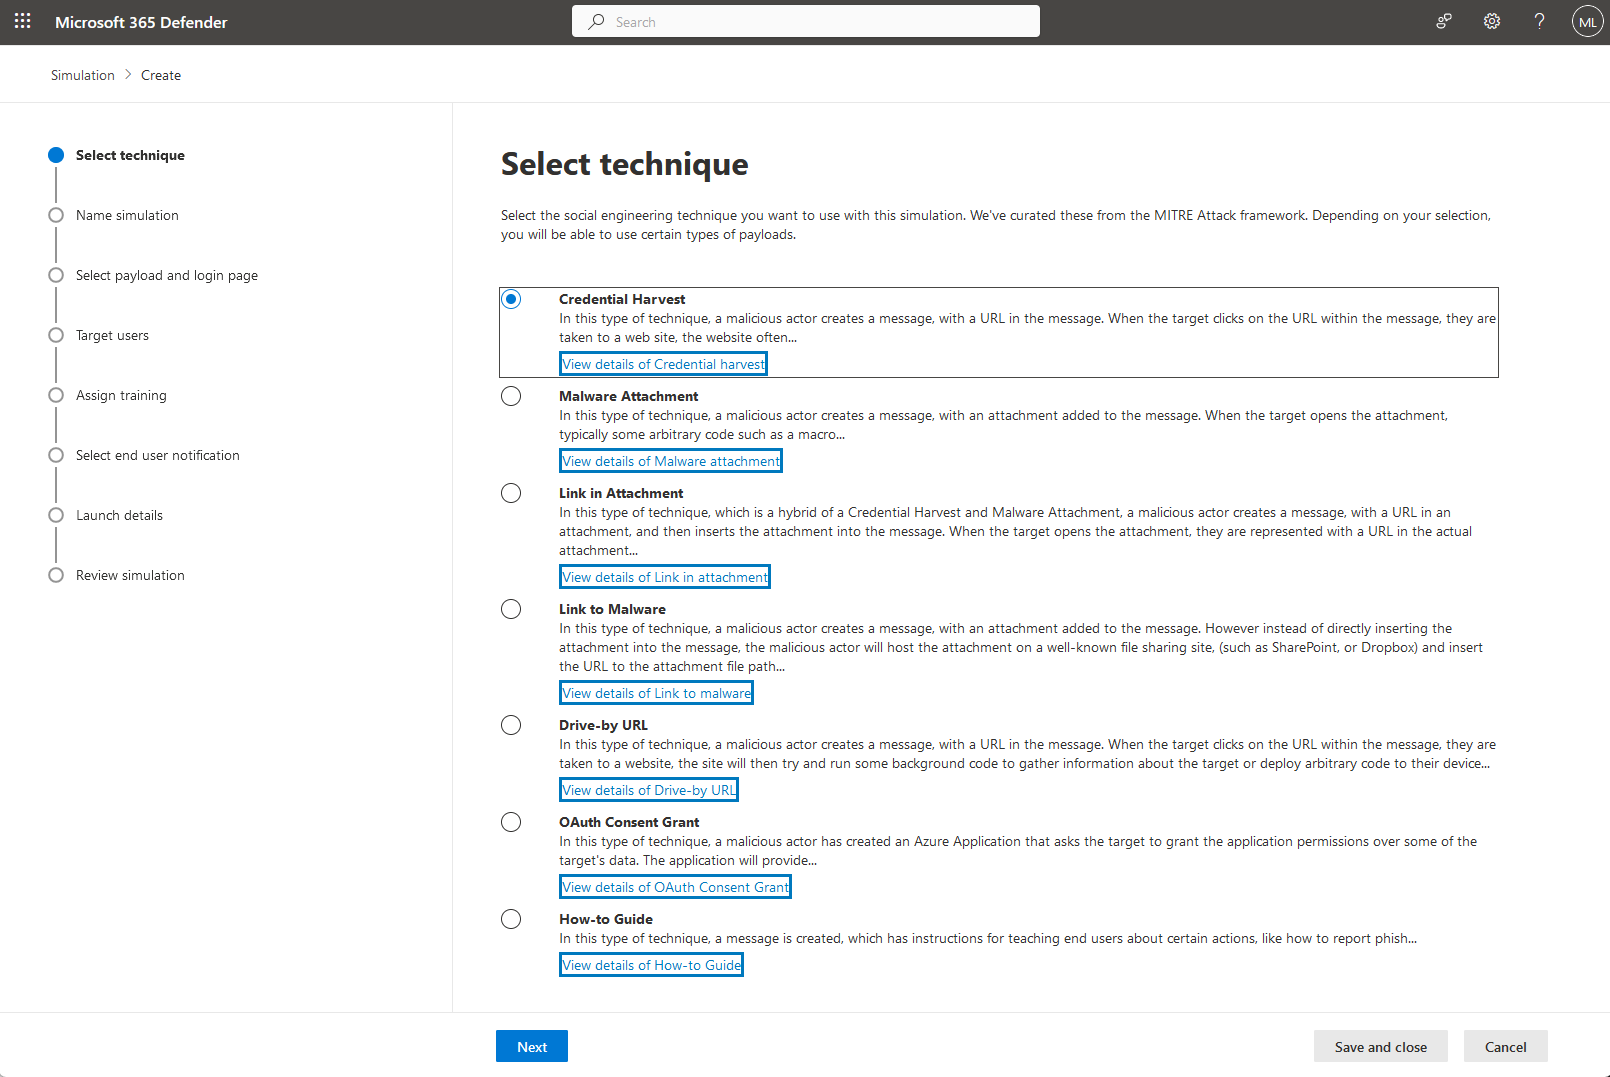
This will load the simulation creation wizard, allowing you to specify all of the details for the test. The first step requires you to select a technique. In this post, we'll use the Credential Harvest technique, which will prompt users who click on the link in the simulation email to enter their credentials. Once you've selected a technique, click Next to continue.
The next step prompts for a simulation name and description. This is what will be listed on the dashboard, so select a name that will be helpful at differentiating simulations if you plan on doing this more than once. After entering a name and description, click Next to move on.
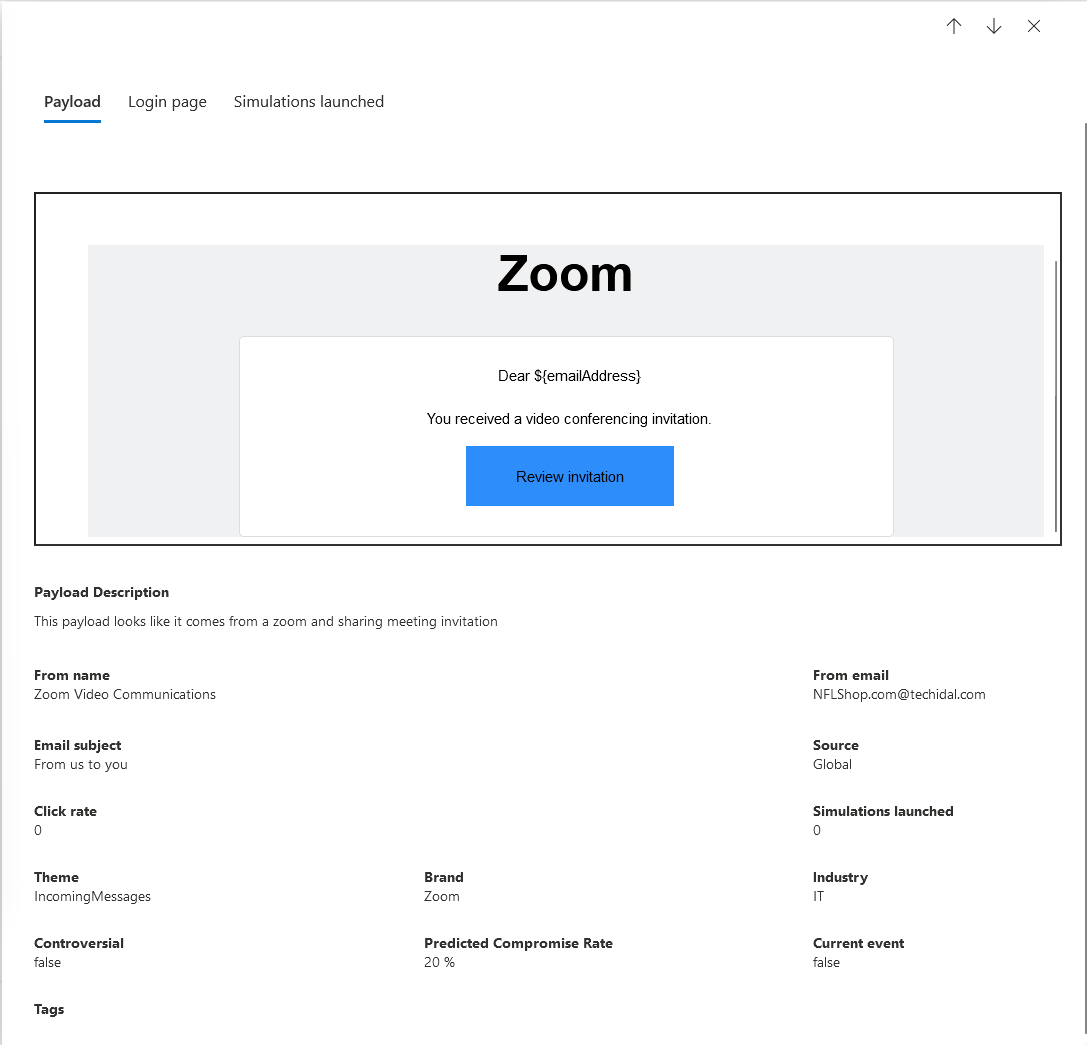
The third step in the wizard is the Payload and login page. This is the most overwhelming part of the configuration due to the many options available. Select one of the payloads that are listed to be sent to the targeted users. Upon clicking on each, you'll see an example of what will be sent to the users (the "ruse" or "pretext"). If there's a specific type of payload you want to evaluate, like a shipping confirmation, you can browse for one that you like and select it. Once you've chosen a payload, select Next to continue.
The next step is the Target users section where you can specify who will receive the simulation emails. You can target the entire organization, specific users or groups, or even specify targets via tags, permissions, or time since they were last targeted. The options are great here to keep a specific cadence on how often users are tested so that you're not constantly overwhelming users with simulated threats. After specifying the users to be targeted, click Next.
This brings up a mini-step which allows you to define a subset of the selected users to exclude from the simulation. The exclusion list is helpful in allowing you to initially select a larger user-set based on groups or permissions, but then exclude specific users from that larger set, if needed. Define all users to be excluded and then click Next to continue.
The next step is the Assign training page which allows you to configure training material that is sent to users who fail the simulation. A full discussion on the training component is beyond the scope of this post, but you can decide whether or not to require training as part of the simulation, as well as a time frame within which a user must complete the associated training modules. Configure this according to your preferences and click Next to continue.
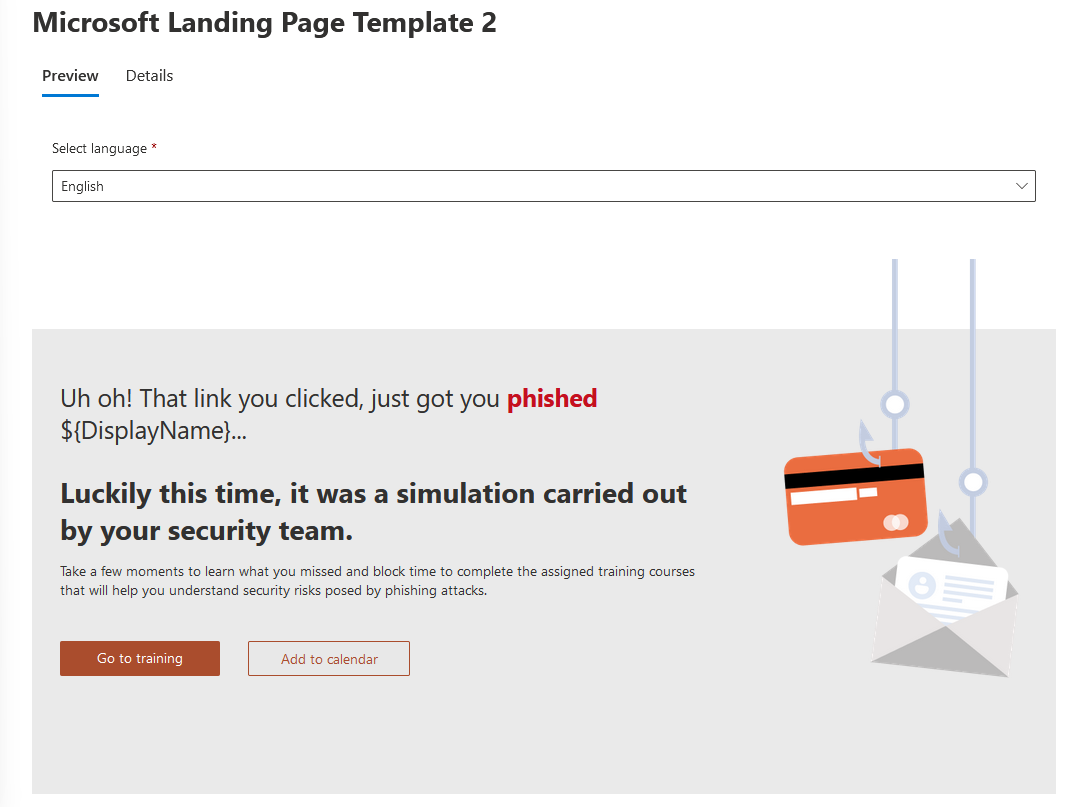
The next page requires you to select a Phish landing page where users are redirected after clicking on the link within the simulation email. The landing page lets users know that a simulation was taking place and that they did something that they shouldn't have. It also outlines tips that show users what to look out for in the future. Similar to the other options in the wizard, you can click on one of the pages to preview it and decide which to use for the simulation. Choose one that fits youd needs and click Next.
Next up is the Select end user notification section where you can specify the notification preferences for the campaign. These are notifications that are sent to users based on the actions they take during the simulation.
Per Microsoft documentation, the following types of end-user notifications are available:
- Positive reinforcement notification: Sent when users report a simulated phishing message.
- Simulation notification: Sent when users are included in a simulation or simulation automation, but no trainings are selected.
- Training assignment notification: Sent when users are assigned required trainings as a result of a simulation or simulation automations.
- Training reminder notification: Sent as reminders for required trainings.
There's an option not to send any notifications, which is worth consideration if you're only looking to capture statistics from the simulation and not follow up at all with the users. If you do want to provide notices to the user, the default notifications are the easiest way to go. Configure the notifications the way that you'd prefer and click Next to move on.
Finally, there's the Launch details page, which outlines when the simulation should be launched. You can specify the simulation start date as well as the length of time that the simulation should persist. Click Next once configured.
The final page for the wizard is the review page, which summarizes all of the options configured for the simulation for review. Click on Submit to finish up.
You're done!
Once submitted, you'll get a confirmation page showing that everything is set and can be viewed from the Attack Simulator dashboard.
The next section shows how the campaign looks to end users, as well as all of the information that is gathered during the simulation to be reviewed during and after the campaign.
Campaign Execution, Statistics, and Reports
This section shows what the simulation emails look like to the end user and shows the management dashboard that the simulation administrators can access to pull statistics about the simulation campaign.
When an email is sent to a target user, it will be delivered directly to their mailbox within O365. For the Credential Harvesting campaign configured in the previous section, the following email is received:
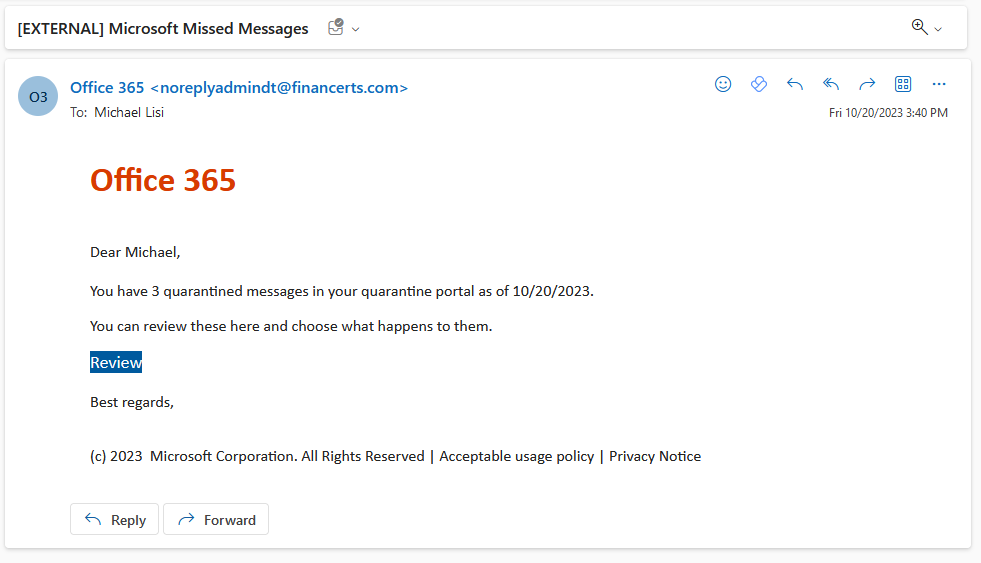
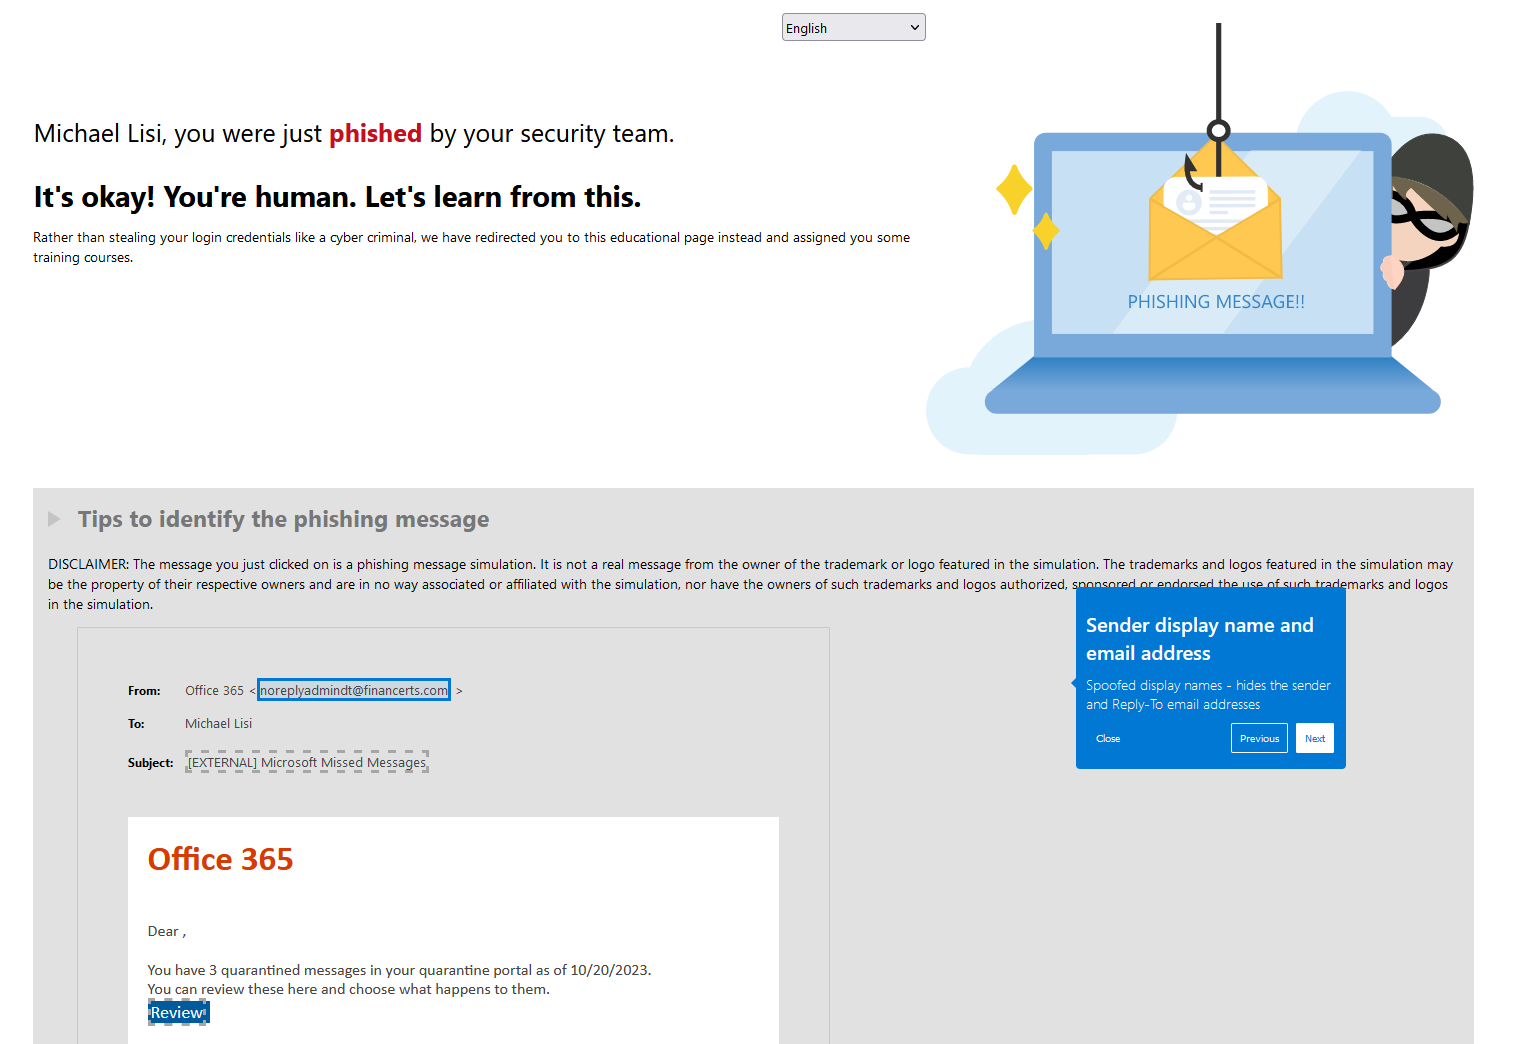
If the user were to click on the Review link contained within the email, they would be brought to a specific page prompting them for their O365 credentials. Should they enter their credentials, they would then proceed to the selected landing page informing them of the simulation:
If training was configured for the campaign, or if user notifications were configured, the user would receive a follow-up email with the specific notification associated with the actions they took (positive reinforcement, training assignment, etc.)
Reporting and Results
Back at the Attack Simulation page, all configured simulations can be reviewed during or after the specified campaign time frame. The most recent simulations are listed on the Overview dashboard.
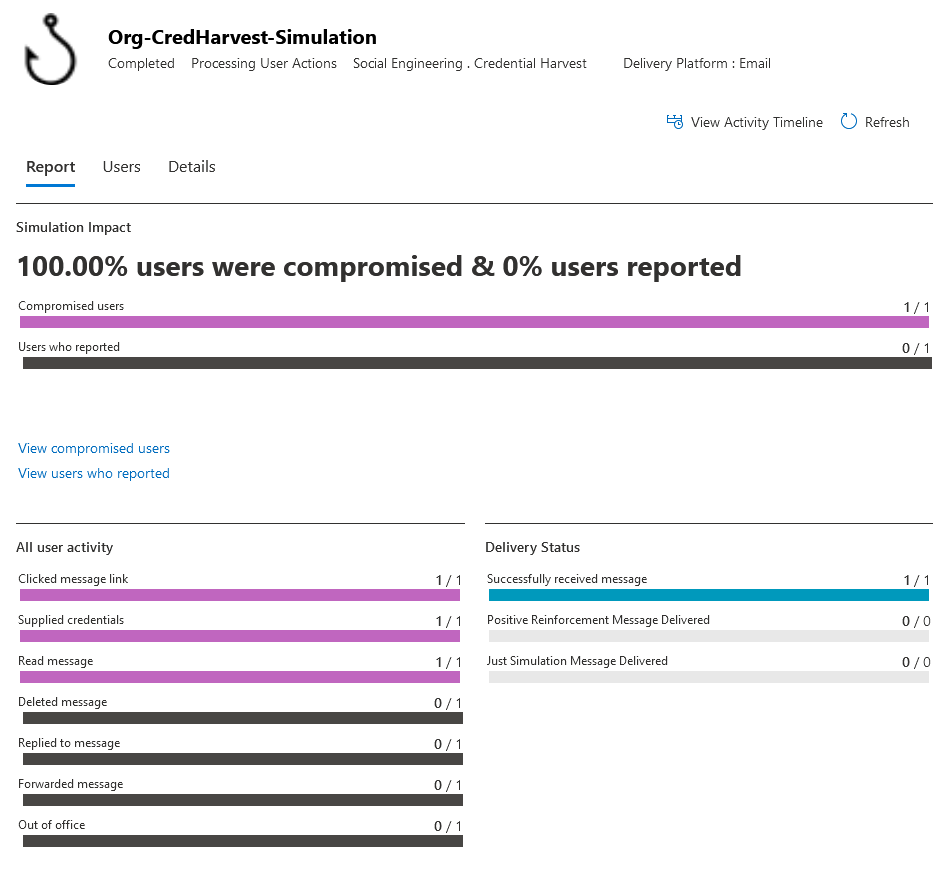
Clicking on one of the listed simulations will load the details associated with the selected simulation. The default Report tab shows how many targeted users were compromised as well as how many users reported the simulation email as suspicious. It also shows a breakdown of activities such as how many users clicked the link but did not submit credentials, how many deleted the message, etc.
The Users tab shows the users targeted for the simulation and the results of the simulation for each user. This allows details about which users were compromised to be reviewed and can help to track their training progress, if configured in the simulation.
Finally, the Details tab shows all of the specific information associated with the configured simulation, including the Payload selected, the Landing page used, the users which were targeted, and the simulation time frame.
Wrapping Up
By running your own security awareness (or attack simulation) campaign, you can gather actionable information about how your users might act when they are targeted with phishing attacks. Microsoft's built-in Attack Simulator tool can be used to launch a phishing campaign against your users without needing to expend a lot of time or money on external resources. While this doesn't cover all potential methods for compromise, it does provide a useful, configurable, way for your administrators to launch phishing campaigns within your organization.